A little while ago I had my first foray into gluten-free breadmaking, with the help of Bakels gluten free bread mix. I bought this mix because it was full of seeds and I prefer my bread to have stuff in it! It contains sunflower seeds, pumpkin seeds, and flax seeds. The mix also contains milk so not suitable for vegans or GFCF, obviously - but I wanted to try something that wasn't just white.
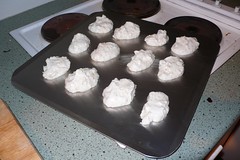
The dough was much wetter than I imagined to be normal for bread - but then again I'd only ever made bread in a bread maker. The dough is more like thick pikelet dough. It's pretty easy to make - there's no kneading, just beating with the hand beater and hey presto!
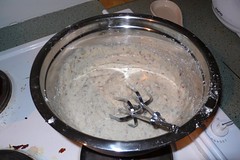
Hey Presto!
I left it to rise on the floor in front of the heater. I couldn't think of anywhere else that would be even vaguely warm. That seemed to do. It didn't really rise, but it did get a bit lighter, which seemed about right for the consistency of the dough.
Rising?
It took ages to cook, I kept sticking a skewer in and it came out doughy. I don't know, perhaps I had the oven temperature wrong. In fact, our oven only does a few temperatures, so if the recipe asks for something in between, you're left to choose. I chose low - would have been fine if I'd chosen high, as my oven is probably low anyway. We tried fan bake for a little bit, realised we were just crisping the outside, then just left the oven on higher for the last while. It probably took almost twice as long to cook as it was supposed to because of all the temperature changing!
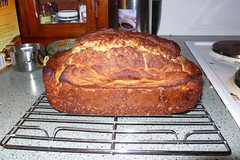
Mmmm cooked bread
When it finally cooked and came out of the oven, and I cut some up while it was still fairly hot and soft. As I was giving a piece to my sister, Neil tasted the bread and exclaimed from the kitchen with GREAT surprise: "What????? This is really good!!! It's not all heavy and bad like gluten free bread!!!!!", which really goes to show that what you get at the supermarket is crapola. When I served the soup to go with the bread he was like: "Can I just have bread?" Not a bad endorsement from a gluten-eater.
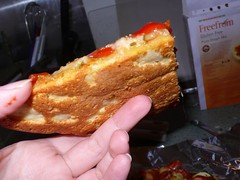
Slightly ragged slice of bread
So... success! (even if it did take three hours).
The bread was fantastic that night. I took the rest of the loaf to work with some sandwich fillings to give it the next-day test. The bread wasn't quite suitable for sandwiches - the top broke off as I tried to cut it, and the inside was fairly fragile. I had a few small squares with a peice of tomato on top, and then made a rough sandiwch with cheese and tomato which I toasted. This sealed the outside of the bread and held it together, leaving the inside soft and yummy. The slices were enormously thick to be able to cut the bread without it breaking too much! This made the toastie machine hard to close. But the results were good.
Cheese toasted sandwich (one I made at home, later).
The most fun thing about taking the bread to work was having a few discussions with random people about making bread, and about gluten free bread. One guy I talked to has a daughter who is GFCF and vegetarian. Snap! (Well, almost...)
I'll be happy to make this bread again. In fact, I wish I could eat it right now, so hungry!
Tuesday, July 28, 2009
Wednesday, July 22, 2009
Maple Mustard Brussells Sprouts
A few weeks ago at the markets, I spied a bag of brussells sprouts, and thought - hey, why not attempt to cook the world's most hated vegetable?
Actually, to be honest, I've never particularly disliked brussells sprouts. I've had some so-so ones that tasted a little strange, but I've also had ones that almost melted in my mouth in a cluster of texturey goodness. Mmm!
Arriving home with my stash, I thought of ways to cook the sprouts. I had seen a few recipes for roasted sprouts, and I seemed to remember seeing a recipe pairing brussells sprouts and maple syrup. I used the trusty Internet to find myself a few recipes, many of them for maple mustard sprouts. Using a couple of recipes as a basis for experimentation, I pulled out the gas burner and heated up the wok...
The results were yummy. And so they should be - I almost finished our bottle of maple syrup. Our little 237ml (8 fl.oz.) bottle of maple syrup, that cost $20 to replace. Why so expensive? Well, Neil says it's organic and tapped by naked virgins.
Ridiculously expensive maple syrup aside, here's a sort of vague recipe-ish type thing!:
Maple Mustard Brussells Sprouts
Ingredients
a generous amount of olive oil and butter
brussells sprouts, trimmed and halved, or quartered if large
a generous spoon of dijon mustard
about a quarter cup of maple syrup
a tablespoon or so of apple cider vinegar
salt and pepper
Method
Heat the oil and butter in a wok.
Brown the sprouts for a few minutes on each side, adding salt and pepper.
Mix the mustard, maple syrup, and cider vinegar, add to the wok, and cook, tossing often, until the sprouts are cooked through and the sauce sticks to the sprouts.
Serve, eat, and savour.
Tuesday, July 21, 2009
Mis-identified Vegetable and Green Pizza
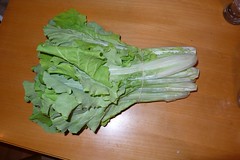
I mis-identified a vegetable I used in my garlic greens stir-fry! I thought what I'd used was broccolini, but now I think it was kai-lan, otherwise known as Chinese broccoli or Chinese kale. According to Wikipedia, broccolini is a cross between broccoli and kai-lan, so at least I was in the right family. Thanks to The Crispy Cook for posting about Chinese broccoli, leading to the discovery of my error! I have to say, I like the name Green Lance best, and love the superhero outfit Rachel donned for her post.
I had a bunch of leftovers from my green stir-fry, and a little bit of chilli leftover from some I had frozen recently. Instead of my usual pizza toppings, I used chilli in place of tomato paste, and cooked greens as the vegetable component.
Freshly Made Leftover Pizza
Not expecting too much from my leftover concoction, I was pleasantly surprised that this was one of the best pizzas I've made! I'll definitely be trying to re-create this one when I have the right leftovers lying around.
Saturday, July 18, 2009
Cookbook Case Study - Quick and Easy - Wrap Up
I really enjoyed the recipes I made from Quick & Easy: Vegetarian Recipes from Around the World for Western Kitchens. Despite burning myself making pot-roasted rice, I really enjoyed the rice and the cardamom mushrooms I made with it. I'll keep the frying-rice-in-peanut-oil technique in mind for next time I want to subtly dress up rice, but I'll be a bit more careful with temperatures.
The two sweet recipes I made from the book were more interesting to me than the savoury. I don't make as many international desserts as I do international main meals, so making dal and jaggery payasam was as exciting and fulfilling as it was delicious and filling! Heavily palm-sugar flavoured, this best accompanies banana and coconut milk to cool it down a little. However, the introduction to the recipe did claim that jaggery is considered to be a 'heating' food, given to children in lumps to nibble during winter. (Nibbling on lumps of jaggery certainly appeals to me!) The second recipe that I made after quite a delay, was for peanut cookies, making a delicious light peanut macaroon that I am looking forward to making again already.
I'm far from finished with this book. There are a number of pages I've stuck bookmarks on, which include recipes such as 'khatti mithi masoor dal' (sweet and sour red lentils), aloo mattar, and 'kab el ghzal' (almond crescents made with ground almond and rose or orange blossom water). Yes, I can see myself enjoying the book for some time. I would certainly recommend it to anyone - vegetarians and omnivores alike - especially to people interested in cooking simple international meals. One thing I particularly like about this book is that it goes beyond India and Asia, including recipes from Africa, Latin America, and the Middle East - culinary regions that I know much less about.
Friday, July 17, 2009
Cookbook Case Study - Peanut Cookies - Quick and Easy
For some reason, I'd been putting off making this last recipe from Global Vegetarian Cooking: Quick & Easy Recipes from Around the World. I'm not sure why - perhaps I had some perception that it would be difficult or complicated - or I thought I didn't have time, expecting it to take much longer than it did. Happily, my procrastination has come to an end! I made the Peanut Cookies (macaroons) from Guadeloupe last night while I was avoiding making dinner. (Okay, perhaps my procrastination hasn't come to an end - it just moved on to something else.)
The recipe truly is simple. Beat egg whites, beat in sugar, stir in ground peanuts and vanilla essence. Bake. The only caution I have is to perhaps use baking paper, as I had some trouble getting the cookies off the baking tray once they were done. I even managed to scrape the surface of my baking tray off with a knife in the process - slightly worrying.
Ready for the oven
We had a cookie each with icecream and chocolate syrup for dessert. As they are meringue based, they go better with icecream than cookie cookies do, I think. I managed to avoid eating more until the next day, when I brought four cookies in to give to a friend, and two for myself. (Apparently, the four cookies for my friend disappeared that afternoon - they are so light and moreish that I'm not surprised!)
I received the following by email shortly after handing them over:
that was one of the best things I've eaten in ages - so nice and light and lovely tasting~!!!!!!!!!!!!!!!
I was certainly pleased that she liked them as much as I did! On arriving home, two more cookies quickly evaporated into my mouth, while I worked on making some bread. From the batch of 12, this leaves two. If she's lucky, there might be one for my sister to try if she drops in later tonight. (If there's not... I hope she doesn't read this and find out!)
Pile of Cookies
So, the verdict is: cookies that are quick, easy, and delicious! Also, not overly loaded with sugar (the recipe from the book has more egg white and much less sugar than the similar recipes I've found online) or fat (only really the fat from the peanuts). They are crunchy, crumbly, good enough to share or to keep greedily to yourself... I am already planning when I'll make these next, and I can see myself getting a lot of use out of the recipe.
In fact, the only problem is thinking of what to do with spare egg yolks! (Hint: it's not putting them in a stirfry - sometimes I wonder how I can even justify having a food blog when I do questionable things like that!)
Tuesday, July 14, 2009
Homemade Chocolate Syrup from Small Notebook
I came across this recipe for homemade chocolate syrup on Rachel's Small Notebook blog, one of my favourite home management blogs in the 'lifestyle' section of my Google Reader.
Making a recipe within hours of stumbling across if is some kind of record for me - I have hundreds of delicious recipes bookmarked that I never quite get around to making! In fact, the main reason I made this so soon is that I was waiting for Neil to get home with the groceries I needed in order to make the bread and cookies I had planned to. I guess he was working a few more hours than expected - I hope coming home to fresh chocolate syrup made up for that a wee bit! The other reason I could make this syrup, of course, was that it is incredibly simple and uses only ingredients we always have!
I won't repost the recipe - you can find it here, and at the same time check out one of my current sources of inspiration for trying to get my life tidy and together!
I might have splashed a little too much vanilla essence in there (Measuring spoons? Psh! - actually, mine were in the dishwasher...), but the syrup is still tasty as. I poured it into an old tomato passata jar, not exactly as fancy as Rachel did it, but functional. (My original idea, an old gin bottle, would be too small to hold two cups of syrup.)
Chocolate Syrup in Passata Jar
Monday, July 13, 2009
Menu Planning: Kumara Rosti, Fried Haloumi, and Garlic Greens
I've started menu planning. Or should I say, I've started menu planning again, as I was planning weekly a few months ago. Everything stops when I get stressed or busy, and plans go unmade or out the kitchen window.
This time, I've decided to try a monthly menu plan following a vague set pattern based on the carb component of the meal, which currently looks something like this:
Mon - Pasta/Noodles
Tues - Rice/Quinoa
Wed - Tortilla/Taco/Nachos
Thurs - Eat out
Fri - Pizza
Sat - Potato/Kumara
Sun - ??? + Baking
At the start of each month, I'll sit down and map out ideas for how to serve these things in a slightly different way each week, and at the start of each week I'll figure out the specifics of what dishes or recipes to make, and what veggies I need to pick up at the markets for the week. Well, that's the plan. I've cooked like this for one week so far, and have planned for the next! Obviously, flexibility for other activities or anticipated laziness is required. I can just shift a meal left or right a day. We don't eat out every week, and Sunday is also free to pick up any extra meals I couldn't be bothered making throughout the week.
Last week, my most adventurous dish was Kumara Rosti with Fried Haloumi and Garlic Greens. All of these were new to me: The greens and the haloumi were self evident, but I consulted a potato rosti recipe that I'd had my eye on for some time (in one of my favourite cookbooks: Vegie Food). Essentially - I substituted kumara for the potato without thinking about it, but that didn't seem to work. Perhaps it was a difference in sugar or water content of kumara compared to potato, perhaps it was equipment, luck, or let's face it, talent (or lack thereof), but what I got was not rosti. It was more like kumara mash or scramble. It tasted fantastic, but rosti it was not.
I bought these greens from the markets, not knowing what they were:
Mystery Greens
I asked the seller what it was, and he just said "it's like bok choi", which was only vaguely helpful.
Kumara
Rosti ingredients all together
The rosti was supposed to cook for 8 minutes on a medium to low heat, until golden and crispy. After that time, nothing seemed to be happening. After a second 8 minutes on an even higher heat, the kumara seemed to be steaming. Another 8 minutes, at an even higher temperature, and still little had changed. Eight more minutes (a total of 32 minutes), and it seemed to finally be browning slightly at the edges. It turns out, though, that this may have been a problem of heat distribution:
Rosti Fail
I also had a bit of trouble estimating the amount of greens required:
Overfilled wok
Luckily, this all reduced down to a manageable amount after flipping it around with tongs for a while. Time to fry the haloumi:
Cheeeeesy
In the end I got there, and served up the rosti, haloumi, and greens:
Dinner, served!
Anyway, at the end of this journey, I can give you some recipes!
Kumara Scramble:
Ingredients
800g kumara, peeled
Finely chopped onion
Fresh or dried herbs (eg. parsley, mixed herbs)
Butter and/or olive oil - a generous amount for frying.
Method
If your kumara are large (mine was a single one weighing 800g!), cut into potato-sized pieces. Boil for 10-15 minutes or until they start to soften. Once at a manageable temperature, grate the kumara, and mix with the onion and herbs. Season. Heat butter and/or olive oil in a non-stick frypan. Fry the kumera on a medium-high heat until fully cooked and browned in places. You may either attempt to make small rosti, or just mix it all up and treat as a scramble.
Garlic greens:
Ingredients
Mix of favourite greens - I used bok choi, broccolini, and some random pale green vegetable.
Huge spoon of garlic - as much as you dare
olive (or other) oil. (I also used some butter - but I think it would have been better without)
Method
Heat oil in a wok and cook garlic for a short time until starting to brown. Add greens and fry until cooked. Don't be like me and assume that all greens cook in no time, or they will be tough and unpleasant. Cook your greens properly!
Serve with your choice of protein, for example fried haloumi OR baked tofu (such as this yummy herbed lemon tofu).
Friday, July 10, 2009
Deconstructed Tacos
Deconstructed Tacos
Originally uploaded by bezajel
A few days ago, my quick, throw-together meal was tacos (deconstructed). When you break the tacos in half and serve them with all the 'fillings' on one big plate, you get around the issue of filling falling out the edges as you bite down.
I have to admit, that the end result is not much tidier than normal tacos, but scooping up beans and vegetables with half a taco shell is just as fun.
Here, my taco has chilli beans (from a can!), grated cheese and carrot, tomato, and lettuce that's too frilly for tacos really. After I took the picture I piled a whole of of extra tomato (chopped into chunks rather than sliced) on top, and threw extra lettuce and carrot into a bowl.
Yum!
Wednesday, July 8, 2009
Food Toxins
The other day, I learned some things I didn't know about toxins in food from the Healthy Food Guide (November 2008). (Yes, I'm that behind in my reading!) To avoid various common toxins, the following steps are recommended:
Fruit seeds and pips
Remove seeds and pips of apples and pears before juicing. I guess this could have implications at juice bars!
Kidney beans
Soak for 4-5 hours before boiling in fresh water for at least 10 minutes. I knew this anyway, but I didn't know why.
Potato or Kumara
Avoid green or damaged areas of potatoes. Remove bruised or damaged parts of kumara before cooking. Don't eat if bitter-tasting when cooked. I applied this one when preparing my last lot of red (Maori) potatoes. I'll tell you what, it's hard to detect bad bits through such dark skin - it was only on peeling many bits that I found dry brown bits underneath!
Mould
Toxins from mould can permeate further into the food - including cheese. Hmm, there goes my (inhereted) "just cut it off, it's still good!" attitude...
Courgettes
Particularly home-grown courgettes can contain toxins. Never eat if bitter smelling or tasting. Well, if we ever grow any!
And last but not least:
Parsnips
Always remove the skin of parsnips. Don't use the cooking water from parsnips. This is the one that scares me the most because, especially recently, I've always left the skin on parsnips. I applied a mix of laziness and the assumption that, like potatoes, the skin would contain most of the nutrients, and therefore should be left on... I guess not.
Friday, July 3, 2009
Freefrom - Pizza Dough Mix
Friday night is pizza night. That's the way it's been ever since Neil and I moved in together a year and a half ago, and I wouldn't dare challenge the routine... not that I'm complaining. I love pizza!
I have one delivery option for pizza - that's Hell Pizza who offer gluten-free bases, and have a nice vegan pizza (called Sinister!), topped with tomato and refried beans - it sounds boring but I really do love it. But in general, I prefer to make my own pizza. Before I became gluten-free, I received a pizza stone for my birthday, and had just started playing with making my own dough. That went on pause for a while, during which time I used the Purebread corn and seed pizza base. These are generally okay, good enough for a convenience, but are not as nice as freshly made bread - and on occasion, have seemed to come out of the packet already stale.
One day browsing the gluten-free products that can be ordered from Woolworths, I found a Freefrom pizza dough mix that I decided to try out - for a more homemade, less corny, pizza base option.
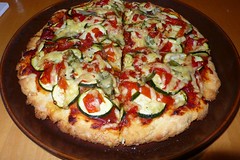
The packet makes two bases, so I halved the recipe to make only one. It was incredibly easy to make using the dough hooks on my hand mixer, and there was no waiting for the dough to rise or anything. I pressed the dough out onto oiled tinfoil, which I put straight onto the pre-heated pizza stone in the oven. After topping with tomato paste, zucchini, roast red pepper, and cheese, of course.
First pizza with new dough
The base was good, so nice having something fresh and bready. I'm probably not used to so much base, so I was really quite full by the end of the pizza (yes, I ate the whole pizza), so next time I split the mixture into two, made one thinner crust pizza, and froze the rest of the dough for later.
Second take: With a thinner crust! (quarter mix). Much better, but perhaps not quite enough for a whole meal?
Thinner crust
The base, with some product placement!
Now that I've tried a few different size options, I think it is perfect to make the whole mix, and separate it into three portions. Two can be frozen (I just cover the dough in a bit more oil, and wrap in glad-wrap (uh, cling film for those of you not in NZ). One third of the packet makes a decent sized pizza for one. This mix is definitely a keeper!
Wednesday, July 1, 2009
Winter Smoothie
This is not so much a recipe as an idea I had that I thought might be crazy until I tried it. While I like smoothies for a quick weekend breakfast, on some of these cold winter days they don't really do much to warm me up.
I thought to myself - why can't I make a hot smoothie? There's no reason banana shouldn't be warm, or chocolate, or milk... so why not try?
Try it I did:
Ingredients
1 cup rice milk
2 bananas
1 tablespoon mexican hot chocolate mix
Directions
Heat rice milk for 2 minutes in microwave.
Place bananas and chocolate in blender.
Add heated rice ilk to blender.
Blend.
Drink while warm.
The result was a warm (but not hot) smoothie. Just enough that it felt warm to my mouth and hands, though the bit at the bottom of the class was cool (I hadn't preheated the glass). The smoothie had a bit more foam at the top than is usual for rice milk and banana. The chilli in the chocolate added some extra heat of another kind.
Caution: Use your own discretion on how much to heat the milk! I'm sure there's a warning on my blender somewhere that says "do not blend hot liquid", but I'm a rebel like that. My blender's glass and fairly sturdy, but I take no responsibility for exploding blenders or whatever may happen if you tried to blend boiling liquid!
Subscribe to:
Posts (Atom)