Monday, April 25, 2011

Chinese Tea Eggs for Easter Monday

Chinese Tea Eggs
Creative Commons License

If you're looking for something to do on the last day of Easter, try these fun, family-friendly, healthy, and attractive tea eggs.

Chinese Tea Eggs
Creative Commons License

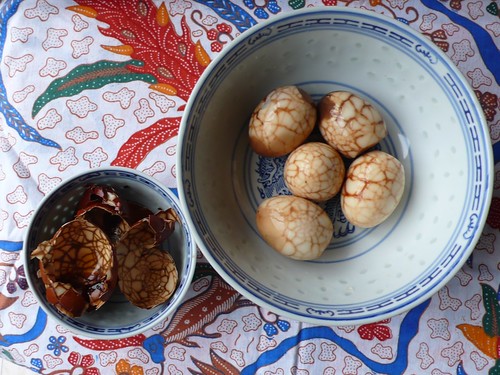
After seeing a post on TasteSpotting, I decided on a whim to make Chinese tea eggs for our family lunch on Easter Sunday. Though appropriate for an everyday snack, these tea eggs are novel enough (in New Zealand!), and decorative enough, to be perfect for this eggy Anglo holiday.* (Their spiderweb design would also make them great for Halloween, but one season at a time.)
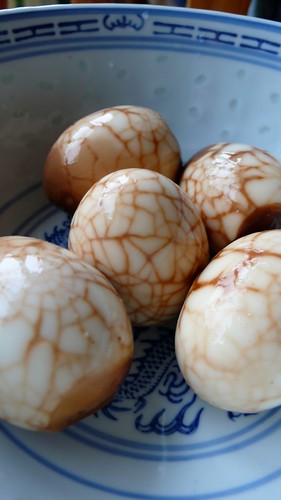
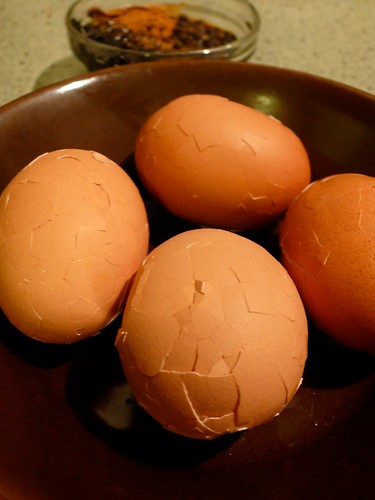
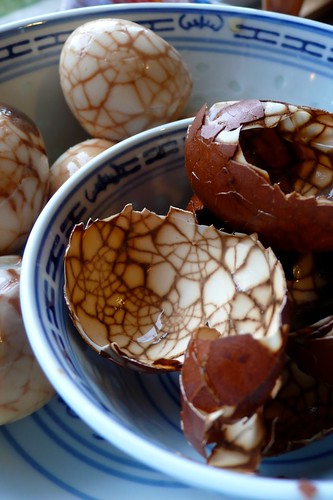
Tea Egg Shells
Creative Commons License

Chinese Tea Eggs
Creative Commons License

The many recipes I saw online agreed largely on the spices I should use, but had a large variation in cooking times. These ranged from pre-boiling the eggs for 2 minutes and simmering for 20, to pre-boiling for 20 and simmering for several hours. So, instead of anxiously fretting about which recipe was 'right', I figured that it probably did not matter too much how long I cooked them for.


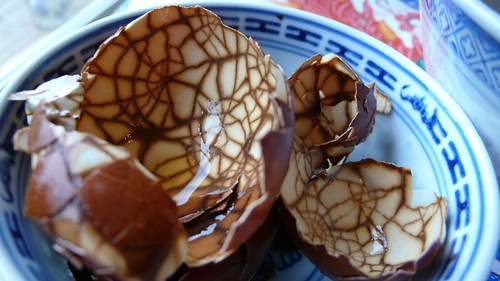
The method for making tea eggs is to hard boil eggs, crack the shell with the back of a teaspoon, return to simmer with black tea, star anise, cinnamon, szechuan peppercorns, soy sauce, tangerine or mandarin zest, and a bit of sugar, and leave to steep overnight to develop dark, intricate patterns over the hard boiled eggs.

As it was getting towards bed time on Saturday night already, I made a start.
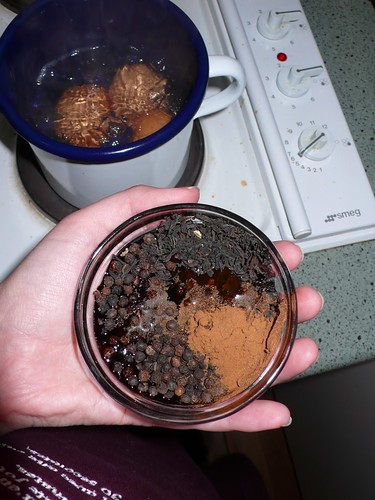
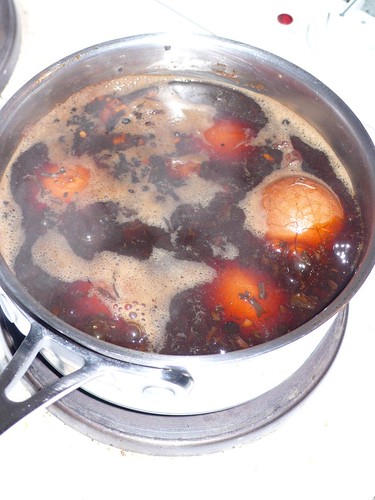
Spice Mix for Tea EggsCracked Shells for Tea EggsSteeping Tea Eggs
Creative Commons License


Chinese Tea Eggs

Chinese Tea Eggs
Creative Commons License


Ingredients:

4 - 6 eggs (I started making four, before realizing I had miscounted potential lunch attendees and hastily boiling up another - which in the end was not required.)

2 star anise pods
2 T black tea (I used ginger infused tea)
2 T gluten-free tamari (or, if you can, 1T soy sauce and 1T dark soy sauce, which will probably give a deeper flavour)
1 T black peppercorns (or szechuan peppercorns if you have them)
1 t brown sugar
1/2 t cinnamon (or a whole piece of cinnamon bark if you have one)
tangerine or mandarin zest (which I didn't have, so I left out)


Method:

Place eggs in a small to medium pot, and cover with cold water.

Bring to the boil and simmer for up to ten minutes.

Retaining boiling water, remove eggs and rinse under cold water, until cool enough to handle. Don't skip this step, especially if you're about to hand the eggs over to young children to crack!

With the back of a teaspoon, crack the shells of the eggs, without removing the shell - this will create your spiderweb patterns on the eggs.

Return the eggs to the water, with the other ingredients, and simmer for about an hour. Watch to make sure your pot doesn't boil dry, though - add more water if necessary.

Remove from the heat, cover, and let steep overnight, or for as many hours as you can allow.

Eat cold by itself or with your condiment of choice. These have a very mild, savoury flavour.
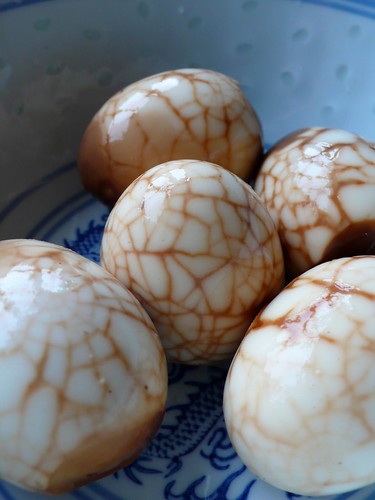

Chinese Tea Eggs
Creative Commons License

We served the tea eggs as part of a delicious lunch spread that my mum, sister, and I pulled together with little to no planning, including inventing a recipe for corn and oat patties - yum!
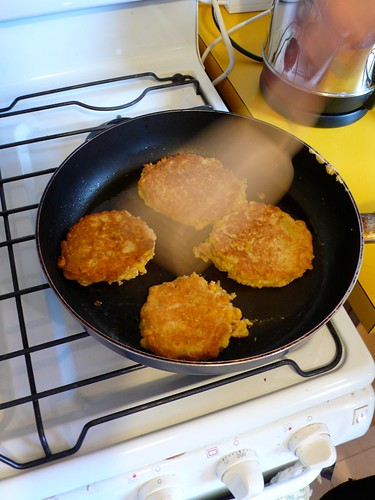
Corn and Oat Patties
Creative Commons License

I didn't actually write down the recipe - we were really just throwing stuff in until it felt right. They contained: a (~400g) can of creamed corn; 2 eggs; about a teaspoon of baking powder; about a quarter cup of corn meal, and probably about one and a half cups of oat flour - I ground two cups of rolled oats, then used not quite all of that. Also pepper and salt. The 'batter' was quite wet and soft, and we spooned it into the frypan, but once fried the bottom was crispy and held together.
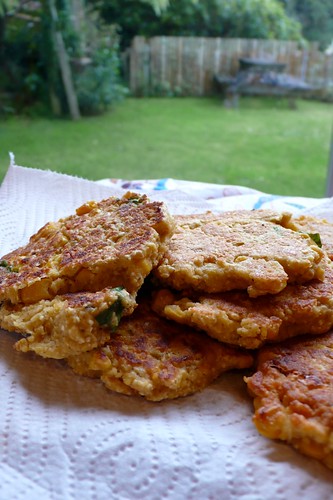
Corn and Oat Patties
Creative Commons License

I love taking picture's with the back yard in the background. Oh the childhood memories!
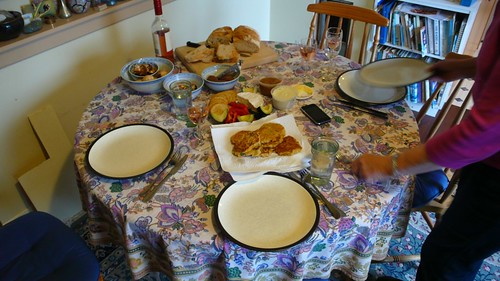
Easter Lunch Spread
Creative Commons License

All in all, a great Easter lunch!


~~~


* with the exception of a pack of lindt peanut butter eggs a month or so before Easter, we haven't bought any Easter eggs this year. This is only because after that first packet, we couldn't find any more of those delicious delicious peanut butter eggs.

Thursday, March 24, 2011

Mushrooms and other visitors

After a few days of rain, today was beautifully sunny, so I opened the door to the deck to let some light and air in. Being outside prompted me to water the raspberry plant given to me by a colleague. I'm pretty bad at remembering to water the plant, but I'll pretend that the reason I haven't recently is because of the rain rather than neglect.

Happily, I noticed that the raspberry had some new growth amongst the dead leaves. I pulled out a few weeds that had shot up, but then noticed something strange.

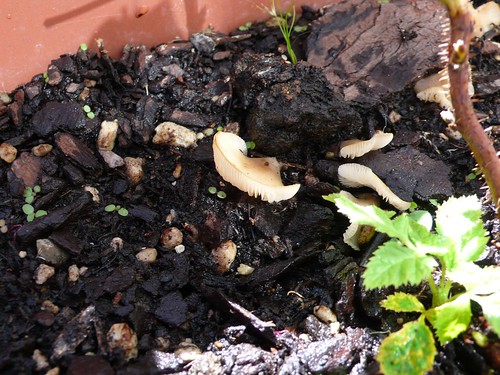
P1080891
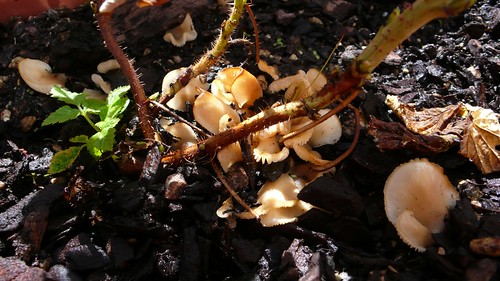
Fungus-y visitor to the raspberry planter.
Creative Commons License


There were some weird mushroomy things around the plant.

Mushrooms in Raspberry Planter
Mushrooms! Wonder if they are edible...
Creative Commons License


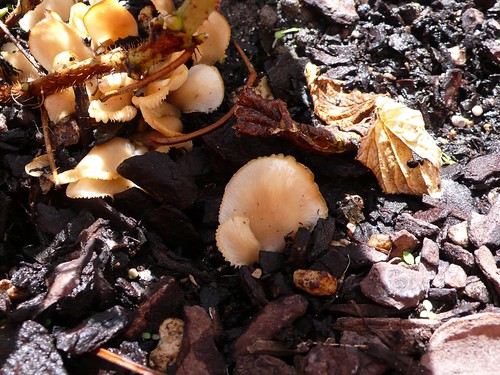
Quite a few of them.

Mushrooms in Raspberry Planter
So many mushrooms...
Creative Commons License


Most of them were clustered near the base of the raspberry, so I suspect they came with the plants when I transplanted them. There's nothing in any of the other pot plants on the deck, so I don't think spores were just floating in the air... I asked my colleague about them, but she hadn't seen them before at her place (the source of the raspberry). She thought that perhaps they had laid dormant in Bulls where she lives, and only grew with all the rain we have in Wellington.

I have no idea what they are, if they are edible or not, or whether I should pull them out ASAP before they spread and poison any raspberries that try to grow despite my maltreatment. Happy to hear any ideas if there are any fungus experts reading my blog ;)

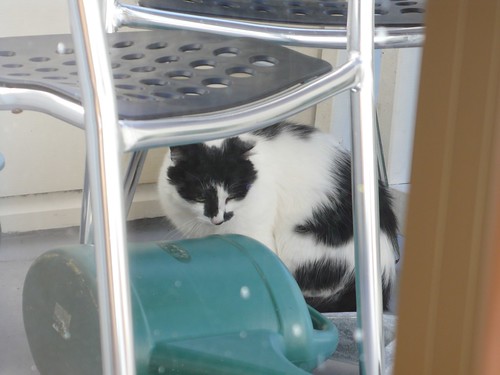
Speaking of unusual visitors to my deck (yes, the mushrooms are 'visiting'), we had another yesterday, napping for a couple of hours under our table. I would have gone out for a snuggle if I weren't allergic, and/or if I hadn't already tried to make friends but found him/her on the timid side...:

P1080888
Furry visitor under our deck furniture.
Creative Commons License

Monday, March 14, 2011

Vegan Dark Chocolate Mousse

Vegan Chocolate Mousse
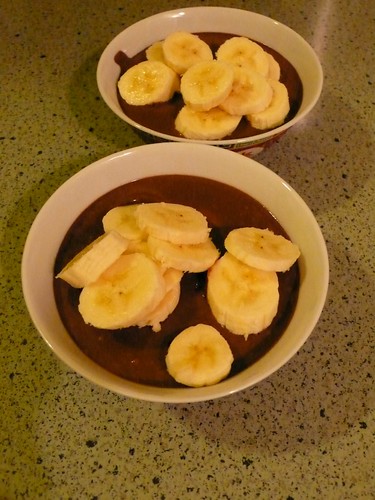
Vegan Chocolate Mousse - with what I call "midnight snack" lighting... ^_^
Creative Commons License


One of my favourite time wasters fillers is to browse through TasteSpotting, 'starring' recipes that I want to adapt or try to make. Recently, there was a yummy-looking post for chocolate mousse made with silken tofu. Despite an interest in vegan cooking, I'd never really used silken tofu in desserts before. I usually use firm tofu in stir fries, and once used silken tofu in place of paneer in a curry, but never as a dairy alternative in desserts...

The recipe looked easy, was described as decadent and 'you would never know there's tofu in it', and would meet my recent craving for dessert, but with fewer unnecessary calories... However, it must be warned that this is not for the mild sweet tooth - this is probably the richest chocolate mousse I have ever had in the sense of chocolatey sweetness. You could tone it down a notch by leaving out some of the additional cocoa and sugar, and I don't think it would suffer for it. I served mine with banana, which actually cut through the sweetness!

The recipe I was following is here. I made a few minor adaptations to the recipe to suit what I had on hand, and translated to metric. Here's my version:


Vegan Chocolate Mousse
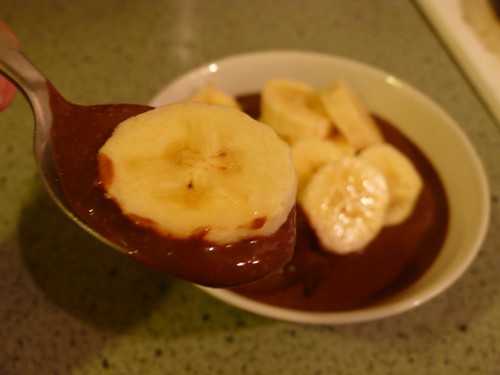
Spoon full of chocolate...
Creative Commons License


Vegan Dark Chocolate Mousse

Ingredients

300g silken tofu
100g dark chocolate (I used 80% - check chocolate is dairy free)
1/4 c cocoa powder
1/4 c water
1 Tbsp rice milk (or other non dairy milk)
2 Tbsp butterscotch schnapps*
1/2 c sugar


* actually I assume this is vegan! The prenzel website doesn't say (link). I used this instead of port or brandy, so use whatever you are comfortable with.


Instructions

Blend silken tofu in a food processor or blender until completely smooth.

In a bowl on top of a pot of barely simmering water, mix chocolate, cocoa, water, milk, and schnapps, and stir until the chocolate has completely melted.

Remove from heat and add the sugar. Mix until smooth and sugar has dissolved.

Pour or spoon into serving bowls, and refrigerate for at least an hour before serving.

Serve with your choice of chopped fruit, vegan cream, as is, or whatever tickles your fancy.

Try not to fall into a sugar coma :)

Saturday, March 12, 2011

A Journey in Waffles

Waffles. Love 'em or hate 'em... Just kidding, I'm not going to start off like that, though my personal waffle history is one of both love and hate.

My family was never a waffle family. Waffles seem to be a particularly American thing: wikipedia support this view. For cooked breakfasts, we would have varieties on pancakes. Thin crepes with lemon juice and brown sugar, golden syrup or treacle, or, occasionally, maple syrup. Pikelets with butter, honey, or whipped cream and jam. The closest we had to waffles as children would have been from the Dutch side my my family: Stroopwafels, or "stroopies" as we called them. And they're not really waffles - they're biscuits.

I was first exposed to waffles as a teenager, when after sleeping over at a friend’s house she pulled out a waffle iron and whipped up a batch. I was fascinated by the waffle-making contraption, and it's fancy pattern (Scandinavian heart shaped waffles, from memory). They seemed easier and so much more exciting than pancakes. But not having waffles in my blood, I soon forgot about their exotic allure.

Flash forward about ten years, when I bought a 3-in-1 toasted sandwich maker, waffle iron, and grill. I only needed a toastie-maker, but this one was cheap! And multi-functional! I eventually remembered my initial excitement for waffles, and though disappointed that my waffle iron was in the relatively boring Belgian style, I decided to try to make waffles for myself.

I chose a recipe from the instruction manual: there were a few, but the one I chose was of an unleavened 'thin and crispy' variety. It looked simple, a good place to start. The recipe included cream. That made it sound fancy, and 'special'. But, I found it bland in texture, and far too rich and heavy in fat for my tastes. I should have expected it - I could never eat cream without feeling ill. Entirely unimpressed, I packed the waffle-iron plates away and stuck to toasted sandwiches.

Flash forward again - perhaps 5 years and a switch to gluten-free - to this week. I was flipping through the Healthy Food Guide looking for menu plan ideas, and came across a recipe for gluten-free waffles. The idea lingered in my mind: Waffles! I made them for brunch the next day.

As with my first cream-laden attempt, I should have known by looking at this recipe that they would be no good. My limited experience with gluten-free flour blends should have tipped me off to the idea that three ingredients alone - white rice flour, water/milk, and salt - would not make a good waffle. I thought at least that a waffle recipe should have eggs or baking powder in it - but I’ve never successfully made waffles, so how would I know?

As soon as I stirred the mix, I knew it was a mistake. The batter was pure white, as starchy mixes are, and the texture was too smooth. I persevered, but what came out of the waffle-maker was a thick, solid, unappetising gum. I ate it. Why? I was hungry, and my very last effort had gone into making those waffles. It was my penance for not recognising a bad recipe. I hate to waste food.


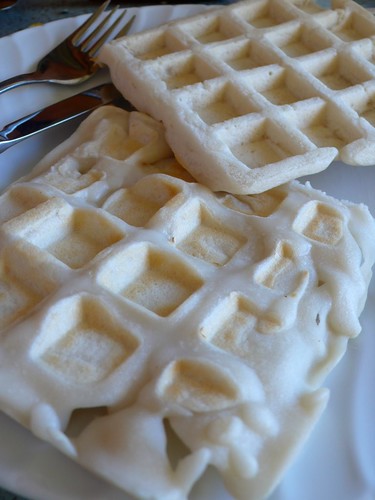
Bad Waffles
Bad Waffles
Creative Commons License


The offending waffles. I won't replicate the recipe here, for obvious reasons. While it's great that the Healthy Food Guide are starting to recognise and cater for people who eat gluten-free, I have given them honest feedback on this specific recipe.

Luckily, the internet is a wonderful resource for gluten-free eating, and a quick search brought up more options that looked much more promising. This morning I rolled up my sleeves, put on a my flour-dusted apron, and got to the business of making a decent waffle.

I settled on a recipe from Gluten Free Cooking School. I needed a recipe using flours that I had in my pantry, and though many good gluten-free recipes I see from the US contain sorghum and teff flour, I have never seen these in New Zealand. I follow the Gluten Free Cooking School blog, so I trusted that this recipe would be pretty good. Also, it looked right.


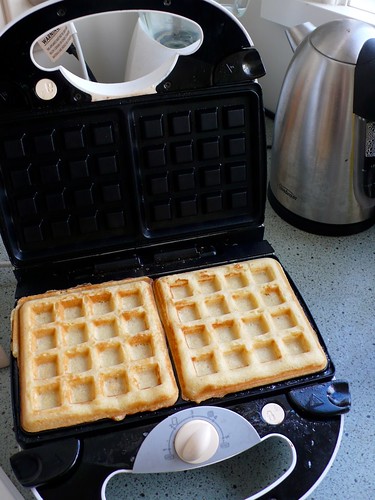
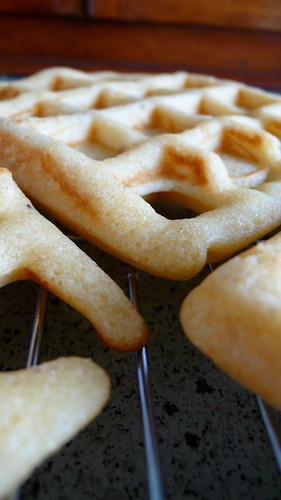
Good Waffles
Good Waffles
Creative Commons License


Here is a link to the original recipe: Gluten Free Waffles. Despite having all the ingredients in general, I didn't quite have the right amounts, so tinkered with the recipe to suit: mostly the flour mix used. My version is published below.

If you have access to 'fancy' flours, you could also try these tempting recipes:

Gluten-free Girl's Waffles
Cinnamon Mochi Waffles on the Daily Dietribe


Gluten Free Waffles

Makes about 7 waffles.


Gluten Free Flour Mix

1 part brown rice flour
1 part ground millet
1 part white rice flour
2 parts corn starch
1 part fine cornmeal
2 parts soy flour
1 part masa de mais (masa harina)

If you treat each 'part' as a quarter cup, you will have about a half-cup more flour mix than you need for this recipe.

Gluten Free Cooking School's original all-purpose flour blend is here, if you prefer. As I only had 1/4 cup of brown rice flour, the ground millet and white rice flour were added as substitutes. Cornmeal substituted some of the corn starch (cornflour in NZ), just in case the white rice flour had increased the starch content too much. I assumed that my masa de mais (for corn tortillas) was masa harina, but you never know.


Ingredients

1 3/4 cups gluten free flour mix
1 Tbsp* gluten free baking powder
1 Tbsp sugar
1/2 tsp salt

3 eggs
1 1/2 cups dairy or non-dairy milk
70 g butter, melted*
1/2 cup canola oil

Canola oil spray, for waffle iron.

* In New Zealand, a tablespoon is 15ml, though I understand that elsewhere it is 20ml. I don't think it matters in this case.

* The original recipe called for 230 g butter, and no oil. I only had 70 g butter, and when used oil to top-up I realised that this is a LOT of fat: feel free to use much less butter and/or oil to taste. I would recommend perhaps 1/2 cup / 100 g fat if you want a tasty but slightly lighter version. Also, I am constantly using this butter converter, because butter should be measured in grams, not tablespoons or sticks or cups, thankyouverymuch!


Instructions

Whisk together dry ingredients in a large bowl.

Whisk eggs until frothy, and mix in milk.

Add melted butter and oil slowly and whisk.

Add wet ingredients to dry, and mix until large lumps are gone.

Heat waffle iron, and spray with a bit of canola oil to prevent sticking.

Pour about a half cup of batter into the waffle iron (adapt to size of iron).

Cook to the instructions of your waffle iron, or by instinct if you prefer.


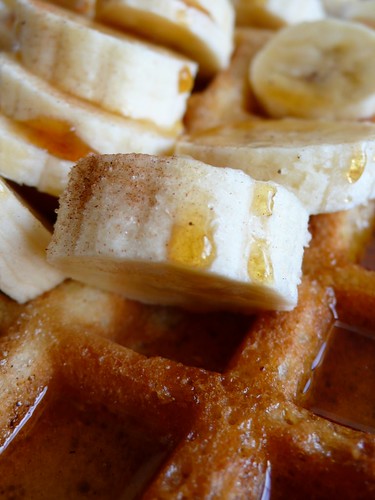
When cooked, serve hot with your choice of delicious toppings. I had mine with banana and maple syrup, and a bit of cinnamon sugar. They were divine - soft, fluffy, tasty, crispy on the outside.

Topped Waffles
Topped Waffles
Creative Commons License


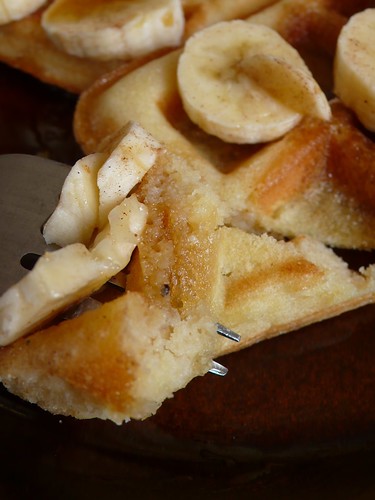
Fluffy Waffles
Fluffy Waffles
Creative Commons License


As this recipe made heaps of waffles, I froze some for Ron. You know - 'ron - Later'on - Well my dad used to say this and I alwasy thought it was hilarious, and apparently still do.

To freeze waffles, cool first on a wire rack, separate each waffle with a piece of wax paper, and freeze in freezer bags. Apparently, these heat well in the toaster for a super-quick breakfast.

Waffles for 'Ron
Waffles for 'Ron
Creative Commons License


Holey Waffles
Holey Waffles
Creative Commons License


Waffles to Freeze
Waffles to Freeze
Creative Commons License


And on that note, stay safe, well, and happy. In New Zealand, we're still reeling from the February 22 quake in Christchurch, so our thoughts are with those in Japan and the Pacific affected by yesterday's 8.9 earthquake and subsequent tsunamis.

Thursday, March 3, 2011

Surreptitious return

While this blog might have looked like it's been dead for some time, it has often been on my mind, and I've been waiting for the right time and motivation to resurrect it.

It turns out that the longer you leave something, the more daunting a task it seems to be. The decisions to make! What can I post about? Do I make some explanation for my long absence, or do I jut get back into it and hope no one notices I stopped for a year and a half? The worries! Will I have any (of my admittedly very few) readers left? Will I just make one post and disappear again forever?

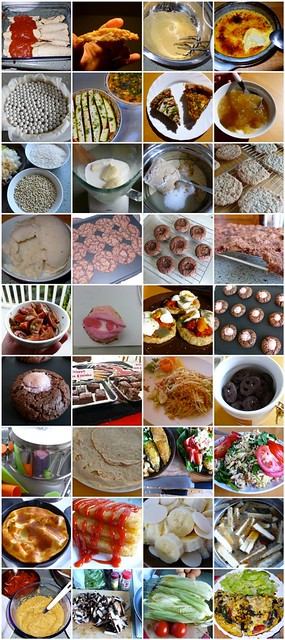
I don't have answers to any of those questions, so I will just get on with it. Since everyone likes pictures, here is a pictorial summary of my last few years in food:


Mosaic
Creative Commons License


1. Enchiladas, 2. Peanut Macaroon, 3. Making Crème Brulée, 4. Crème Brulée, 5. Blind baking pie crust, 6. Two Pies, 7. Two Pieces of Two Pies, 8. Lemon Sago, 9. Mixed Grain Risotto, 10. Making Banana Ice-Coconut-Cream, 11. Making Peanut Butter Cookies, 12. Peanut Butter Cookies, 13. Banana Ice-Coconut-Cream, 14. Mexican Chocolate Snickerdoodles, 15. Thumbprint Cookies, 16. Peanut Brownies, 17. Tomato Salad, 18. Cunt Cupcake, 19. Savoury Hotcakes, 20. Breast Cookies, 21. Breast Cookie, 22. Brownies with Options, 23. Vege Pad Thai, 24. Chocolate Pretzels, 25. Fun-Mirror Pots, 26. Galettes, 27. Fish and Fried Potato, 28. Spinach Egg Fried Rice, 29. Gluten Free Dutch Baby, 30. Unhealthy Snack Stack, 31. White on White on White, 32. Tempeh Simmering, 33. Grits, 34. Making Frittata, 35. Frittata Ingredients, 36. Frittata